Monday, November 25, 2013

Knit: Deer Hat

I saw this blog post: http://400squareftliving.blogspot.ca/2013/10/knitting-woodland-stagdeer-baby-hat.html

And she uses chunky yarn so I adapted the pattern to worsted weight and am quite happy with the results!!


Find me!
Www.facebook.com/kidsknithats
Www.etsy.com/shop/kidsknithatsncrafts 

Friday, November 8, 2013

Knit: Cabled Santa Hat

Got a new pattern for this beauty from Knit in the womb. Find her on Facebook for the pattern. Or find me for a completed hat! Red or green. Knot or Pom Pom!
Or 
Pom pom (off pattern!) 


Www.facebook.com/kidsknithats

Wednesday, November 6, 2013

Knit: Chunky Beanie

I had the opportunity to use some amazing chunky merino wool to make these beanies! Stripes added for fun. 

Watch for an update on when/where you can purchase them as they are part of a collaborative effort!


Www.facebook.com/kidsknithats
Www.etsy.com/shop/kidsknithats
Www.etsy.com/shop/kidsknithatsncrafts 


Monday, November 4, 2013

Knit: Baby Camo Helmet Hat

I cannot wait to meet my brothers baby! Boy or girl this hat is 100% them. Camo and orange details... A hunters dream. :)


Find me:
Www.facebook.com/kidsknithats
Www.etsy.com/shop/kidsknithats 
Www.etsy.com/shop/kidsknithatsncrafts 

Saturday, November 2, 2013

Knit: Patterned Hat

I made this little beauty for myself. I've had it sketched in my notebook for a long time now. The yarn is fun!

Find me:
Www.facebook.com/kidsknithats
Www.etsy.com/shop/kidsknithatsncrafts

Sunday, October 27, 2013

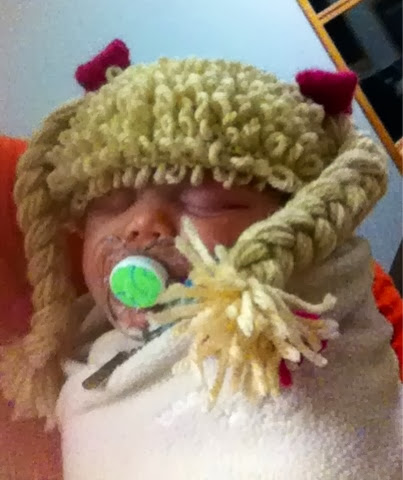
Crochet: Cabbage Patch Inspired Hair Hat

Halloween is here!
Before:
After:
And without a baby in it:
It's downright silly. Inspired by repeat crafter me blog! Modified of course.

Www.facebook.com/kidsknithats
Www.etsy.com/shop/kidsknithats 
Www.etsy.com/shop/kidsknithatsncrafts


Thursday, October 24, 2013

Sewing: Marker or Crayon Holder

I was searching for a creative way to haul markers or crayons around. After some time skimming Pinterest for a good tutorial (there were none) I winged it and came up with this beauty.

I didn't take any more pictures of it being made but I can recap my general steps.
Take whatever you want to haul (markers, crayons, etc) and measure it the long way. Multiply that number times 3 then add a little smudge. Couple inches. That is the up and down measurement. 
The other way I guesstimated about 1.5 inches per marker, x12markers = 18 inches. I cut it 19 inches to have a 1/2" seam allowance.
Then I cut a piece of quilt batting in a rectangle the size of the finished unit (18"x10" or so). Perfection not required.
Then I folded my fabric square right sides together into thirds. The 1st and 2nd third are the backing. Then the last third I folded in half as the pocket for the markers.  Then flip it right side out. Measure out every 1.5" and sew up the edges and slats.
Sew your ribbon on or however you want it to close.

Good luck! I'll take more pictures next time!

Www.facebook.com/kidsknithats